
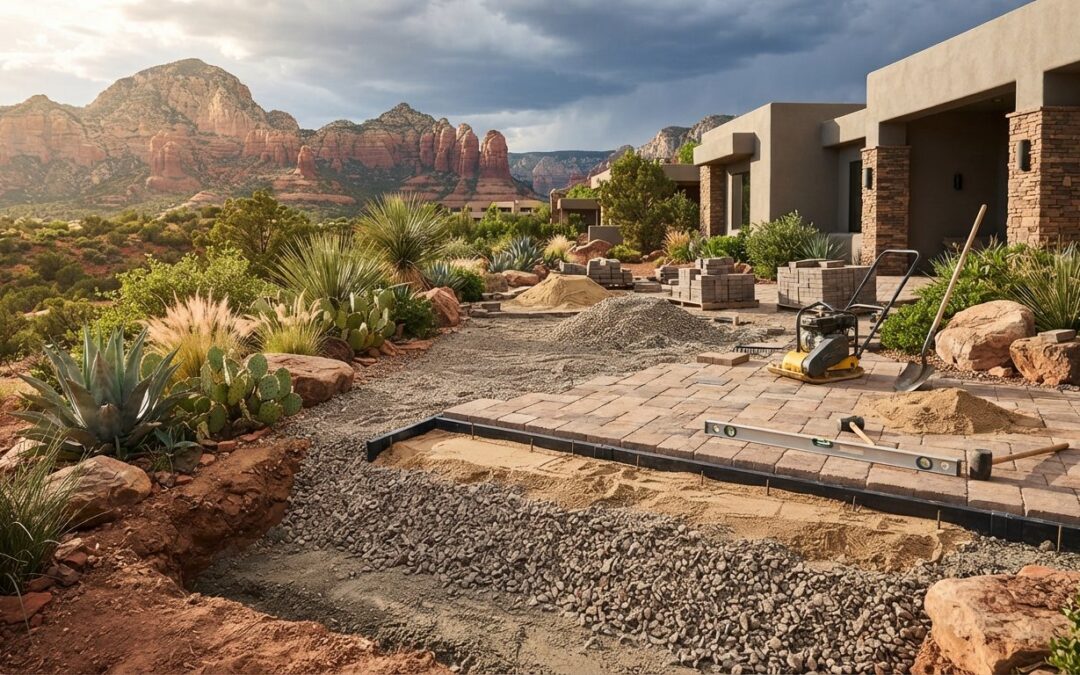
In the high desert of Northern Arizona, the ground beneath your feet is often less of a foundation and more of a moving target. You likely envision a beautiful, sun-drenched space for weekend cookouts, yet you worry about your investment shifting or sinking after the first heavy monsoon. It is a valid concern. Many homeowners find that common DIY paver patio mistakes, such as misjudging the rock-hard caliche layer or neglecting proper drainage, can turn a dream project into a costly failure.
We want to ensure your outdoor living space remains as enduring as the surrounding landscape. By following this 2026 checklist, you will learn how to identify the structural red flags that lead to uneven surfaces and stagnant water. We will cover everything from the mandatory Arizona 811 safety protocols to the specific base materials that survive our extreme thermal shifts. This guide provides the professional standards you need to build with confidence; it helps you decide exactly when to pick up the shovel and when to consult a seasoned professional for your property.
Key Takeaways
- Learn the “Total Depth” calculation to ensure your excavation provides the structural integrity needed for Arizona’s unique terrain.
- Discover why using Aggregate Base Course (ABC) instead of stone dust is critical for avoiding common DIY paver patio mistakes in our shifting desert soils.
- Master the 2% slope rule to safeguard your home’s foundation from high-volume monsoon runoff and unwanted standing water.
- Identify why professional-grade edge restraints are the essential skeleton that keeps your hardscape from spreading or sinking over time.
- Evaluate the long-term value of professional hardscape construction to ensure a “buy once, cry once” investment for your property.
Mistake #1: Underestimating Excavation Depth and Soil Stability
One of the most frequent DIY paver patio mistakes is assuming the hole only needs to be deep enough to tuck the stones into the grass. In Northern Arizona, where the soil expands during monsoons and contracts in the dry summer heat, a shallow foundation is a recipe for shifting. You aren’t just digging a spot for a paver; you are building a structural system that must support weight and manage water. Without adequate depth, your beautiful new patio will likely become an uneven trip hazard within its first year.
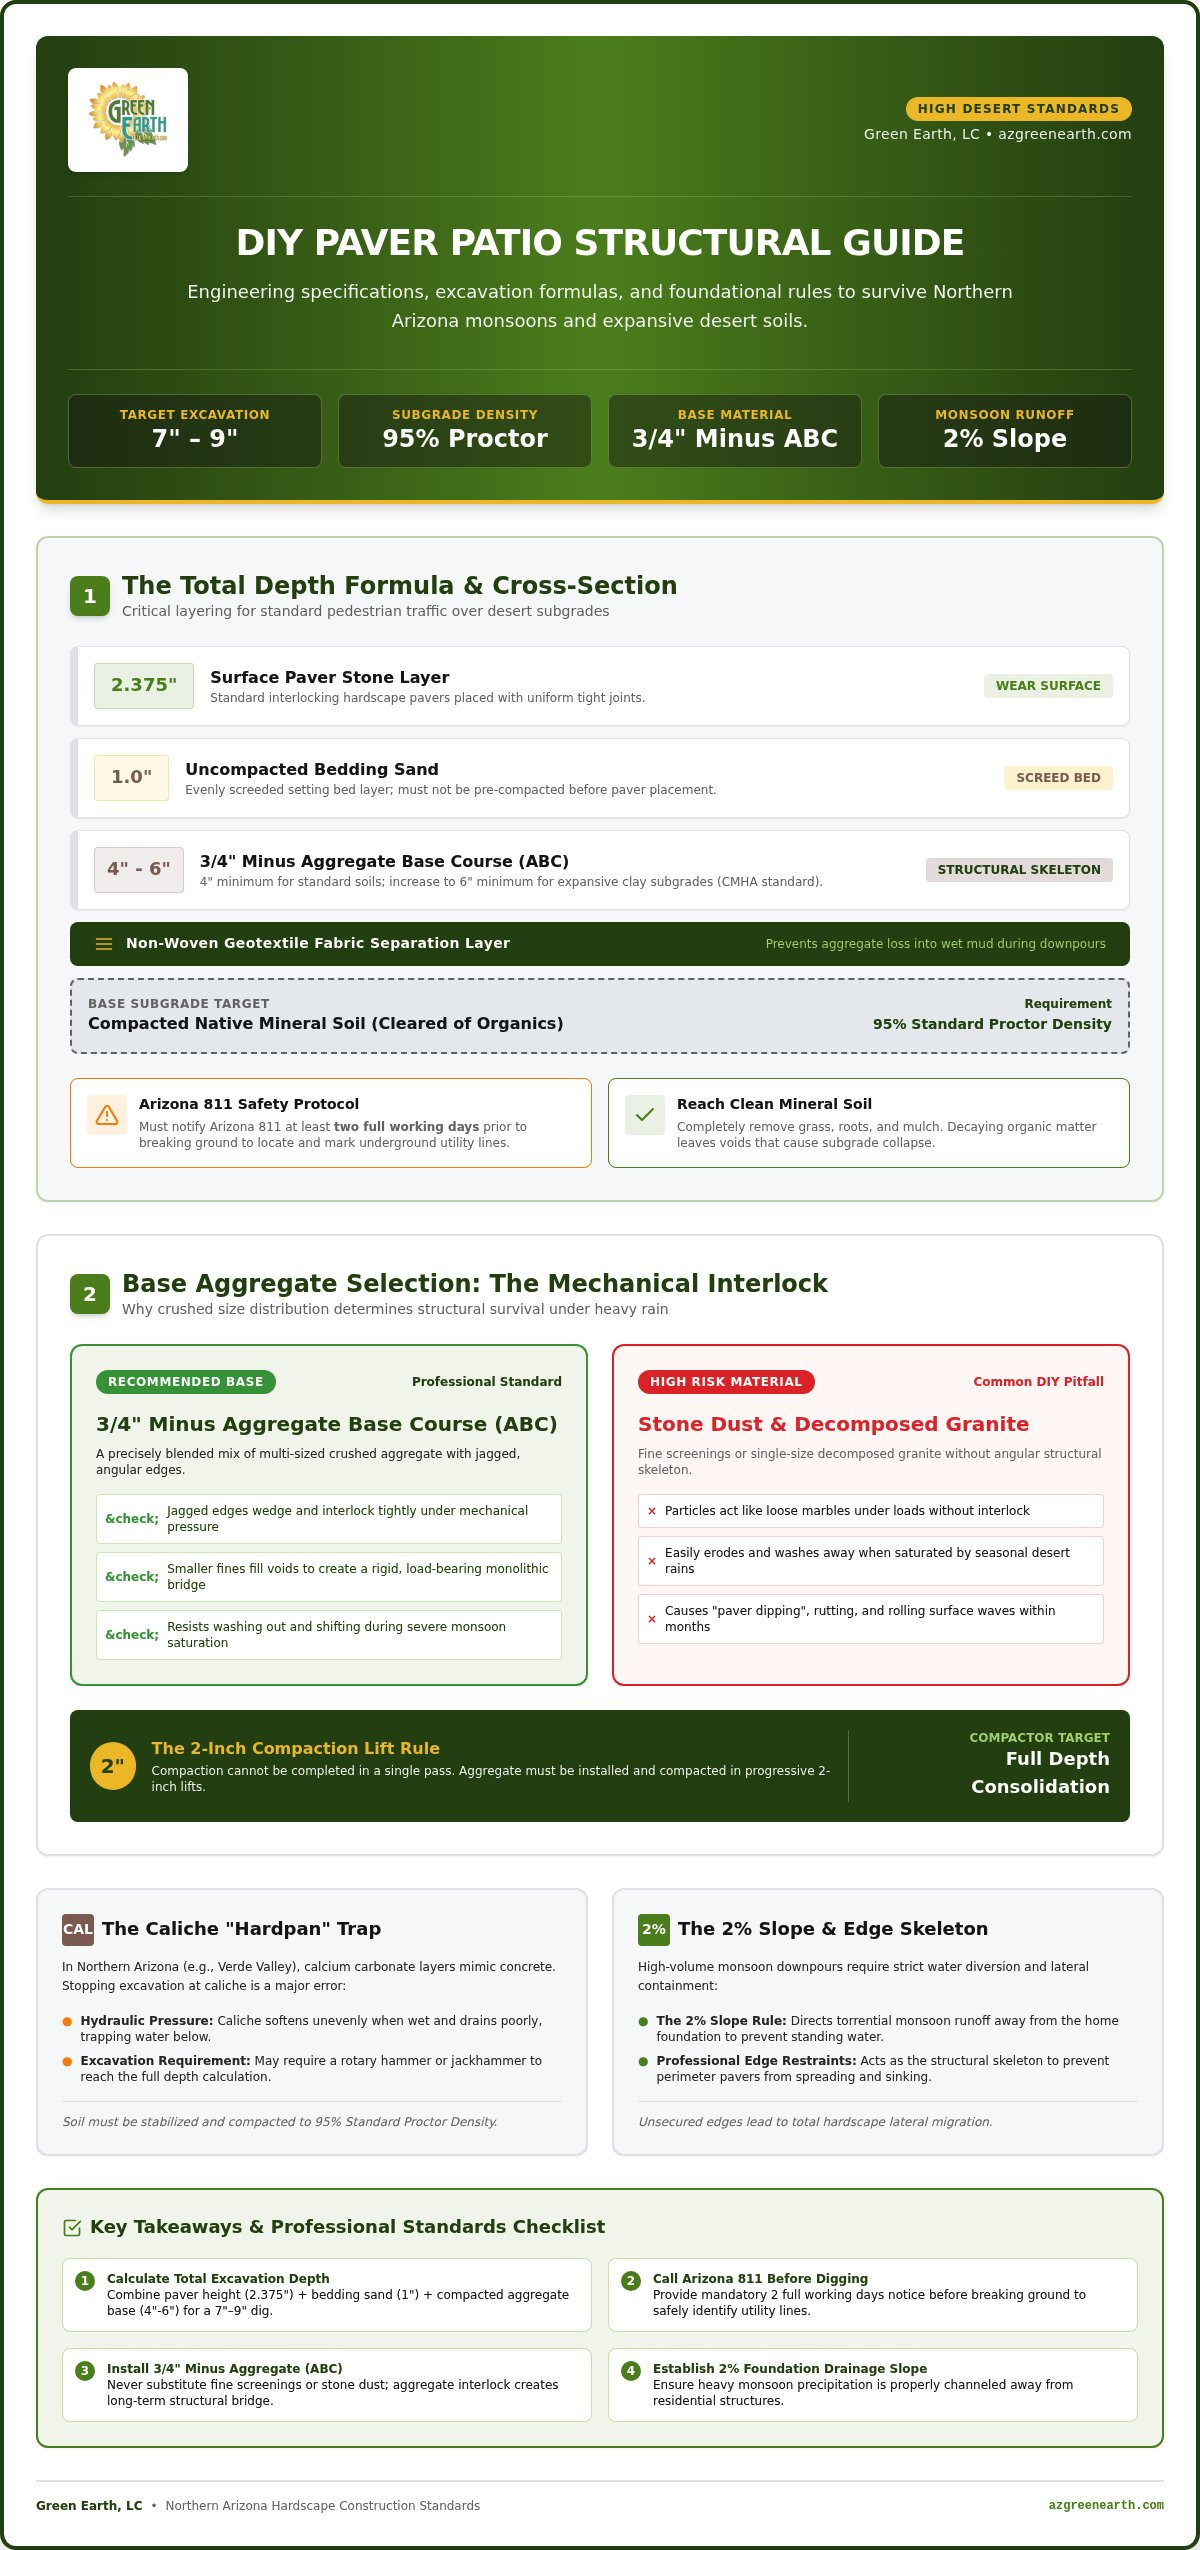
To reach a professional standard, use the Total Depth Formula. This includes the paver height (usually 2.375 inches), a 1-inch layer of uncompacted bedding sand, and a minimum of 4 inches of compacted aggregate base. For sites with expansive clay or weak sub-grades, the Concrete Masonry & Hardscapes Association (CMHA) recommends increasing that base to 6 inches. Skipping this depth leads to rutting, where the pavers sink into the soft earth below. We also recommend placing a non-woven geotextile fabric between the native soil and your base rock. It acts as a barrier that prevents your expensive aggregate from disappearing into the mud during a heavy Sedona downpour.
The Danger of Shallow Foundations in Northern Arizona
Shifting soil and high-altitude freeze-thaw cycles demand a stable sub-grade. Before you start the Total Depth dig, you must remove all organic matter. Grass, roots, and mulch decay over time; this creates air pockets that cause your patio to collapse. Use this checklist to ensure your foundation is prepared correctly:
- Contact Arizona 811: Notify them at least two full working days before breaking ground to mark utility lines.
- Reach Mineral Soil: Clear all vegetation and topsoil until you hit firm, light-colored soil.
- Target Depth: Aim for a minimum excavation of 7 to 9 inches for standard pedestrian traffic.
Dealing with Rocky Sub-Grades and Caliche
Homeowners in the Verde Valley often hit a wall, literally. Caliche is a rock-hard layer of calcium carbonate that feels like natural concrete. Many DIYers stop digging when they hit it, erroneously believing it is a solid, permanent base. However, caliche softens unevenly when exposed to moisture and drains poorly. This can create hydraulic pressure underneath your pavers during a monsoon deluge.
If you encounter this “hardpan,” you might need a jackhammer or a heavy-duty rotary hammer to reach your target depth. If the ground is too rocky to level perfectly, you must stabilize the sub-grade by compacting the native soil to 95% Standard Proctor Density. Taking the time to address these geological hurdles now prevents the “buy once, cry twice” scenario that happens when a patio fails due to poor ground preparation.
Mistake #2: Selecting the Wrong Base Materials and Skipping Compaction
After you finish the excavation discussed earlier, the next hurdle is material selection. Choosing the wrong foundation is one of the most common DIY paver patio mistakes that leads to “dipping” or “waving” within months. Many homeowners assume any crushed rock will suffice, but the structural integrity of your patio depends on the mechanical bond of the aggregate. In our region, using the wrong fines can lead to a total structural failure when the ground becomes saturated.
Professional installers specify 3/4″ minus Aggregate Base Course (ABC). This material contains a specific blend of crushed stone sizes that interlock under pressure to create a rigid, load-bearing surface. Avoid using stone dust, fine screenings, or decomposed granite as your primary base. These fine materials lack the structural skeleton of larger aggregate; they often wash away or compress unevenly when saturated by Northern Arizona’s seasonal rains. While these fines might look smooth, they don’t provide the “bridge” needed to support heavy pavers over time.
Aggregate Base Course vs. Screenings: Choosing the Right Foundation
The difference between a lasting patio and a temporary one often comes down to the “interlock.” When you use ABC, the jagged edges of the larger rocks wedge together, while the smaller particles fill the voids. This creates a base that resists shifting even under heavy foot traffic. Screenings or “decomposed granite” lack this variety in size, which means they act more like marbles under your pavers. Over time, this results in “paver dipping,” where individual stones sink as the fine base shifts beneath them.
The Science of the 2-Inch Compaction Lift
Compaction is not a one-step process. A compaction lift is the process of compressing aggregate in thin, two-inch layers to ensure uniform density throughout the entire foundation. Trying to compact four inches of loose gravel at once is impossible for standard rental equipment. The bottom half will remain loose, eventually settling and causing the pavers above to sink. Achieving this level of stability requires specialized equipment and a keen eye for soil behavior. If the technical demands of soil density feel overwhelming, our team specializes in professional pavers hardscape services designed to withstand the Verde Valley climate.
Hand-tamping is never sufficient for a lasting build. You need a commercial vibratory plate compactor to reach the 98% Standard Proctor Density required by industry standards. To ensure a solid foundation, follow this checklist:
- Perform the Hand-Clump Test: Squeeze a handful of ABC; it should hold its shape without dripping water or crumbling instantly.
- Compact in Lifts: Spread only 2 inches of material at a time before running the machine.
- Vary Directions: Run the plate compactor 3-4 times over each lift in perpendicular directions.
- Check for Soft Spots: If the machine “walks” unevenly or creates deep ruts, add more moisture and compact again.
Mistake #3: Neglecting Proper Drainage and Grading for Monsoon Season
A perfectly level patio sounds like the ultimate mark of craftsmanship, but in hardscape design, “flat” is a structural failure. Between June 15 and September 30, Northern Arizona experiences intense monsoon events that can drop 1 to 2 inches of rain in a single hour. One of the most dangerous DIY paver patio mistakes is failing to plan for this volume of sheet runoff. Without a designated path, water will pool on your pavers, saturate the base, and eventually undermine the entire foundation.
The industry standard for preventing these failures is the 2% Rule. This requires a minimum slope of 1/4 inch per linear foot, directing water away from your home’s foundation. If you skip this step, you risk more than just a few puddles; you risk permanent damage to your home’s stem walls or post-tension slabs. Integrating drainage grading Arizona property owners can rely on is the only way to ensure your outdoor investment doesn’t become a liability during a summer downpour.
Managing Sedona and Verde Valley Monsoon Runoff
Sedona’s famous red rocks and the high clay content of the Verde Valley create a unique challenge for water management. These surfaces do not absorb water quickly. When rain hits a large paver surface, it gains velocity as it sheds. If this water is not managed, it creates hydrostatic pressure. This occurs when trapped water beneath the pavers pushes upward, eventually forcing the stones out of alignment or washing out the bedding sand. To mitigate this, consider incorporating French drains or channel drains into your DIY plan. These systems can catch high-volume runoff and direct it toward natural desert landscape features, keeping your patio dry and stable.
Grading Away from the Foundation
Your patio should never turn your home’s crawlspace or backyard into a pond. Proper grading is a precision task that requires more than just a “good eye.” Many DIY paver patio mistakes happen because homeowners trust their visual perception rather than using professional tools. You must verify your slope at every stage of the build. Use this checklist to ensure your grading meets professional standards:
- Set a String Line: Run a tight string from the house to the end of the patio area.
- Use a Line Level: Ensure the string is perfectly level before measuring your drop.
- Measure the Drop: For every 4 feet of patio, the ground should drop at least 1 full inch.
- Identify Pooling: If your yard currently holds water for more than 24 hours after a storm, you likely require professional drainage grading before laying a single paver.
By taking these measurements seriously, you act as a responsible guardian of your property’s landscape. Proper grading ensures that your patio remains a beautiful, functional asset rather than a source of environmental stress for your home.
Mistake #4: Improper Paver Layout and Failing to Secure Edge Restraints
Securing the perimeter is the final step in creating a structural “skeleton” for your hardscape. One of the most avoidable DIY paver patio mistakes is failing to install professional-grade edge restraints before the final sand jointing. Without this support, the lateral pressure of use combined with the thermal expansion of Arizona’s summer heat causes the stones to migrate outward. This lateral shift ruins the tight aesthetic of your layout and creates voids where bedding sand can wash away, leading to a total collapse of the perimeter stones.
When laying the stones themselves, use the “Click-and-Drop” method. Instead of sliding the paver into place, which disturbs the carefully screeded bedding sand, you should place it straight down against the edge of the previous stone. This ensures consistent joint spacing and a level surface. If you find the layout becoming complex or the precision cuts required for a curved border becoming difficult, you can always request professional pavers hardscape assistance to ensure your design is executed with lasting precision.
Why Plastic or Concrete Edging is Non-Negotiable
In the Verde Valley, the intense UV exposure can warp low-quality plastic edging if it is not buried and secured correctly. Many homeowners make the mistake of spiking their restraints into the loose bedding sand rather than the structural foundation. For a lasting build, you must spike the restraints directly into the compacted aggregate base using 10-inch steel spikes. While plastic is common, many Northern Arizona professionals prefer a concrete “bond beam.” This is a submerged concrete toe troweled along the perimeter that provides a permanent, immovable border that won’t degrade in the desert sun.
The Polymeric Sand Trap: Avoiding Haze and Washouts
Polymeric sand acts as the high-performance glue that prevents Northern Arizona weeds and ants from colonizing your patio joints. However, it is a temperamental material that requires specific conditions to succeed. The most critical requirement is a bone-dry patio surface. If the pavers are even slightly damp from morning dew, the polymers will activate prematurely on the surface of the stone. This creates a white, milky “haze” that is incredibly difficult to remove without specialized chemicals. Once the sand is swept into the joints, you must activate it with a gentle mist. Flooding the surface with a hose will wash the polymers out of the sand, leaving you with a brittle joint that will fail during the next monsoon washout.
- Verify Dryness: Wait at least 24 hours after any rain or cleaning before applying sand.
- Clear the Surface: Use a leaf blower to remove all excess dust from the paver tops before misting.
- Controlled Activation: Mist the area three times, waiting 10 to 15 minutes between each pass to allow deep penetration without saturation.
The Long-Term Value of Professional Hardscape Construction
While the spirit of a weekend project is admirable, the physical and financial reality of avoiding DIY paver patio mistakes often points toward professional intervention. For many homeowners, the hidden costs of tool rentals and material delivery can quickly erode any perceived savings. In 2026, renting a commercial plate compactor from centers in the Verde Valley costs approximately $85 to $115 per day. When you factor in the multiple weekends required to complete a manual excavation, these fees accumulate alongside the high cost of correcting structural errors. Professional hardscape construction Cottonwood AZ provides an efficiency that residential tools cannot match. We utilize industrial-grade machinery that ensures your base reaches the 98% Standard Proctor Density required for a truly stable surface. If you are researching similar high-standard outdoor construction services in other regions, you can find out more about the specialized work of Bestcare Builders.
Professional installation also carries the weight of a structural warranty, something no DIY project can offer. In the Phoenix and Scottsdale real estate markets, a professionally installed hardscape patio can recoup 60% to 80% of its installation costs at home resale. This ROI is only possible when the build adheres to the strict CMHA standards we have discussed, ensuring the stones stay level and the drainage remains effective for decades.
There is a point where the scale of a project shifts from a hobby to a heavy civil engineering task. If your design involves retaining walls over 3 feet in height or complex drainage grading, the risk of failure becomes a safety concern. Moving 10 tons of base material by hand is a grueling physical toll that often results in shortcuts during the compaction phase. At Green Earth, LC, we frequently assist clients by correcting failed attempts where DIY paver patio mistakes have already led to sinking or spreading. Choosing a professional partner ensures your project is a “buy once, cry once” investment that adds immediate equity to your home.
Investing in Sustainable Beauty
A professionally installed patio is the difference between a five-year fix and a fifty-year legacy. Our approach integrates your outdoor living space into a cohesive desert landscape design that respects the local ecology. We consider how your hardscape interacts with native flora and ensure your property adheres to firewise landscaping principles for maximum defensible space. By choosing an established community leader with 47 years of experience, you gain the peace of mind that comes with a commitment to excellence and environmental stewardship. We invite you to transform your vague vision into a functional reality. Schedule a consultation with Green Earth, LC for your next project to begin your journey toward a more beautiful, sustainable home.
Building a Legacy in the Arizona Landscape
Your outdoor living space should be a sanctuary that reflects the natural beauty of the Southwest. A successful build requires more than just laying stone; it demands a deep understanding of soil stability and monsoon water management. By avoiding common DIY paver patio mistakes like shallow excavation or improper base compaction, you protect your property from the harsh shifts of the Verde Valley climate. Precision in the early stages ensures your investment remains level and beautiful through every season.
At Green Earth, LC, we bring over 47 years of Northern Arizona expertise to every project. Our commitment to excellence has earned us recognition as a statewide runner-up for Best Sustainable Landscape Designer by Green Living Magazine. We understand the unique challenges of local rock and weather patterns, ensuring your hardscape is built to last for generations. If you’re ready to move beyond the stress of a complex build, we’re here to serve as your visionary partner. Transform your backyard with professional hardscape construction from Green Earth, LC. Let’s create a functional reality that you can enjoy with complete confidence.
Frequently Asked Questions
How deep should I dig for a paver patio in Arizona?
You should typically excavate to a depth of 7 to 9 inches for a residential pedestrian patio. This allows for a 4-inch compacted aggregate base, a 1-inch bedding sand layer, and the height of the paver itself. In areas like Flagstaff or Sedona with expansive clay or rocky sub-grades, increasing the base to 6 inches provides extra stability. Reaching this specific depth is essential to avoid common DIY paver patio mistakes related to soil movement.
Can I lay pavers directly on dirt or sand?
Laying pavers directly on native dirt or a thick layer of sand is a guaranteed recipe for failure. Native Arizona soil expands and contracts with moisture changes, which will cause your patio to become uneven almost immediately. A structural foundation of compacted Aggregate Base Course (ABC) is required to distribute weight and allow for minor drainage. Without this rigid base, your stones will sink into the earth during the first heavy rain.
What is the best base material for a patio in Sedona?
The most reliable base material for Northern Arizona is 3/4″ minus Aggregate Base Course (ABC). This specific blend of crushed stone and fines interlocks to create a solid, load-bearing foundation that resists the shifting common in Sedona’s red rock regions. Avoid using decomposed granite or stone dust as a primary base. These materials lack the structural integrity needed to support pavers and often wash out during high-volume monsoon events or seasonal snowmelt.
How do I stop my pavers from shifting or sinking?
Preventing shifting requires a combination of 98% Standard Proctor Density compaction and professional-grade edge restraints. You must use a vibratory plate compactor in thin two-inch layers to ensure the base is rock-solid. Once the pavers are set, installing a concrete bond beam or spiked plastic edging creates a perimeter skeleton. This prevents lateral movement, which is one of the most frequent DIY paver patio mistakes seen in the Verde Valley.
Is polymeric sand worth the extra cost for DIY projects?
Polymeric sand is an essential investment for any Arizona patio project because it hardens to resist wind and water. Unlike regular play sand, it contains additives that “lock” the joints, preventing Northern Arizona weeds and ants from taking hold. It also withstands the high-velocity sheet runoff typical of our monsoon season. While it requires a bone-dry surface for application, the long-term reduction in maintenance makes it a superior choice for a lasting build.
How do I handle drainage for a patio during monsoon season?
You must maintain a minimum slope of 1/4 inch per linear foot to direct water away from your home’s foundation. In Cottonwood or Camp Verde, where monsoon rains are intense, this grading is non-negotiable. If your site has limited space for runoff, you may need to incorporate French drains or channel drains into the design. Proper drainage ensures that water moves toward natural desert features rather than pooling beneath your structural pavers.
What tools do I absolutely need to rent for a DIY patio?
You absolutely need to rent a commercial vibratory plate compactor and a wet masonry saw with a diamond blade. A hand-tamper cannot achieve the density required for a stable patio, and manual stone cutters often lead to jagged, unprofessional edges. If you encounter the rock-hard caliche layer common in our region, you should also rent a demolition hammer or a heavy-duty rotary hammer to reach your necessary excavation depth.
When should I hire a professional for my hardscape project?
You should consider hiring a professional if your project involves retaining walls over three feet, complex drainage grading, or massive square footage. Handling 10 or more tons of aggregate by hand is a significant physical burden that often leads to skipped steps. Green Earth, LC brings 47 years of experience in Northern Arizona to ensure your project meets sustainable standards. Our expertise helps you avoid the costs of correcting a failed DIY attempt.
Recent Comments