
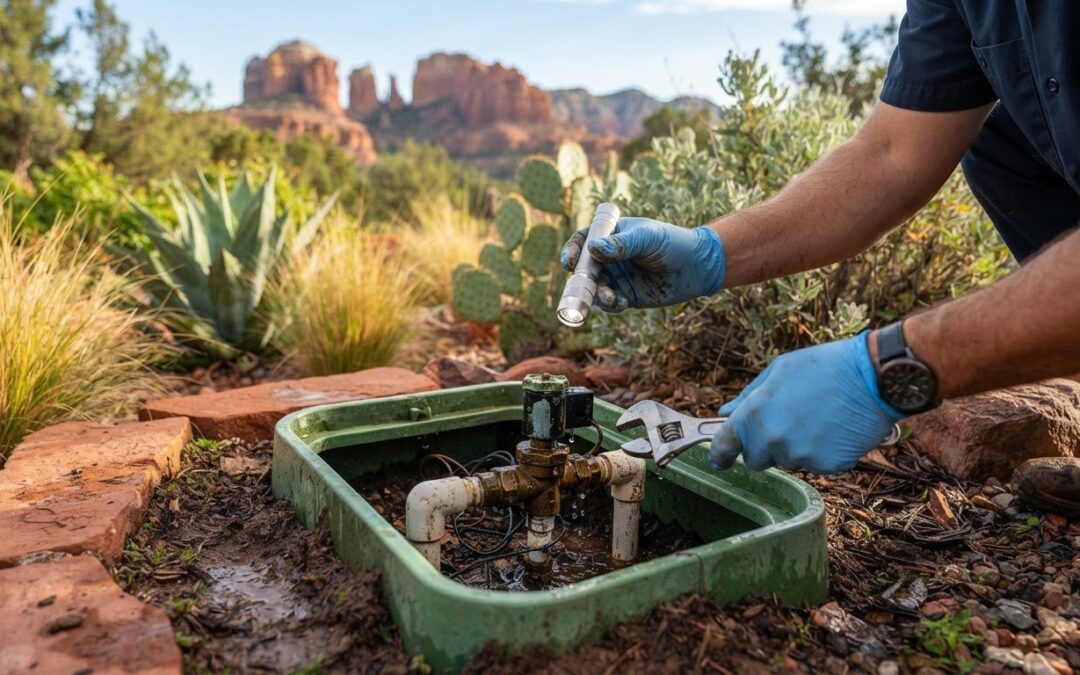
Water pooling around a sprinkler valve may actually be coming from a nearby pipe or fitting. Before replacing parts, pinpoint where the water first appears. Learning how to fix a leaking sprinkler valve starts with a careful inspection, because a worn diaphragm, debris, or a damaged line can call for very different repairs.
It’s understandable to worry about wasted water or making the problem worse. A measured approach can help you identify the likely cause and decide whether a small repair is within reach. Before inspecting or opening any components, shut off the irrigation water and follow the valve manufacturer’s instructions.
This guide walks you through checking where the leak begins, recognizing common valve problems, and choosing an appropriate repair. You’ll also learn when persistent leaking, damaged pipes, or uncertain wiring make professional irrigation diagnosis the sensible next step. Prompt, accurate repairs help protect your irrigation system and support responsible water use in Northern Arizona.
Key Takeaways
- Trace where water first appears, then check nearby fittings and pipe before deciding the valve is leaking.
- Match the next check to the leak’s location. Debris, worn seals, loose connections, and cracks are possible causes, not certain diagnoses.
- Learn how to fix a leaking sprinkler valve by following a careful, conditional repair sequence and using only compatible parts approved by the manufacturer.
- Stop and seek professional help if you can’t isolate the water, find a cracked valve body, or still see a leak after repair.
- A qualified irrigation professional can help distinguish a valve problem from connected pipe, controller, or broader system trouble.
How to Find Where a Sprinkler Valve Is Leaking
A persistently wet valve box, water that keeps flowing after a zone shuts off, or a soggy patch nearby can all point to an irrigation leak. But water around the box doesn’t prove the valve itself is faulty. A sprinkler valve controls water flow to an irrigation zone; nearby pipe, fittings, or landscape runoff may be the actual source. Understanding how irrigation systems work can help you trace the water before deciding how to fix a leaking sprinkler valve.
Is the leak coming from the valve, a fitting, or a pipe?
Start by noting where water first appears. Check the valve body, the seam beneath its bonnet, around the solenoid, near the wiring entry, and at threaded connections. Then inspect adjacent PVC or other irrigation pipe for cracks, movement, or visibly wet joints. Water may also run into the box from higher ground or drain from another part of the landscape. Trace the wet area back instead of assuming its lowest point is the source.
For an initial check, turn off the irrigation controller and observe the area. If water continues to emerge, the leak may be on a pressurized supply line, or residual water may be draining through the landscape. If the area stays dry, restore water only when safe, then briefly run the suspected zone while watching from a safe position. Note exactly where water appears and whether it stops when the zone shuts off. Avoid prolonged testing, which can waste water or worsen damage.
What to do before opening the valve
Before taking anything apart, find the valve’s make and model. Its identification details can help you locate the correct manufacturer instructions and compatible parts. Turn off the irrigation water supply and relieve pressure as directed by the manufacturer before opening the valve. Don’t rely on the controller being off to make a valve safe to open.
- Take a photo of the valve and its connections before handling parts.
- Keep clear of exposed wiring, and don’t force a stuck component.
- Stop if you can’t confidently isolate the water, access the valve safely, or identify where the leak starts.
A clear diagnosis guides the next step. If the source remains uncertain, professional irrigation troubleshooting can help distinguish a valve problem from a connected pipe or another system issue.
Why a Sprinkler Valve Leaks: Common Causes to Check
The repair depends on where water escapes. A wet valve box alone doesn’t confirm a failed valve. Water may be coming from a nearby fitting or pipe, while a valve that leaks internally may let water pass into a zone without a visible crack. Leak location is a useful clue: water at a seam points toward a valve component, while moisture at a joint or along a pipe suggests a connection or line problem.
Debris, worn seals or diaphragms, loose connections, and cracks are all possible causes, not automatic diagnoses. The U.S. Environmental Protection Agency’s inspect, connect, direct, and select guidance also emphasizes checking irrigation connections for leaks. In Northern Arizona, mineral buildup or heat-related wear may be worth considering, but inspect the components before treating either as the cause.
Debris, diaphragm, and solenoid issues
Small particles inside a valve can interfere with the diaphragm seating properly. If it can’t close against its seat, water may continue to pass through even when the zone should be off. Depending on the valve design, moisture near the diaphragm cover or solenoid may help identify the area to inspect, but it doesn’t confirm which part has failed. Follow the manufacturer’s guidance before opening or cleaning anything.
A solenoid or controller issue can also affect whether a valve opens or closes as intended. For example, a zone that continues running after the controller signals it to stop may point to a control or valve-closing problem. But an electrical issue doesn’t explain every physical leak. Water visibly escaping from a seam, fitting, or crack needs a separate inspection.
Cracked bodies, fittings, and connection leaks
Look for a visible crack in the valve body, damaged threads, or water emerging at a connection. Compare the wet point with the valve and adjacent pipe. A crack in the valve body differs from a split line nearby, even if both leave water in the same box. If you can’t tell which component is leaking, avoid guessing at replacement parts.
Don’t overtighten a loose-looking fitting. Excessive force can damage plastic threads or parts and make a leak worse. First isolate the water, then check the manufacturer’s instructions for that specific connection. If the valve body appears cracked or the damage is unclear, professional irrigation system repair can help distinguish a valve fault from a connected pipe issue before you proceed with how to fix a leaking sprinkler valve.
Choose the Right Fix for the Type of Sprinkler Valve Leak
Choose a repair based on what you observed, not simply on water in the valve box. The same symptom can have different causes, so use the leak location to decide what to check next. If the source or safe repair method isn’t clear, stop rather than replacing parts by guesswork.
| Observed leak location | Possible cause | Reasonable next check | When to stop |
|---|---|---|---|
| Inside the valve or around its cover | Debris, a worn diaphragm, or a seal issue | Check the manufacturer’s instructions for cleaning or replacing accessible internal parts. | Stop if the valve design is unfamiliar or parts won’t come apart without force. |
| Around a threaded or joined connection | Loose or damaged connection | Identify the exact wet point and inspect the fitting for damage. | Stop if threads appear damaged or tightening risks cracking plastic. |
| At a crack in the valve body or nearby pipe | Damaged valve or irrigation line | Confirm which component is cracked and isolate the water if you can do so safely. | Arrange professional assessment if the leak is persistent, flooding, or hard to isolate. |
| Water continues into the zone when it should be off | Debris, a diaphragm issue, or a control problem | Check the valve and controller instructions before diagnosing further. | Stop if wiring is uncertain or the cause remains unclear. |
When cleaning or replacing an internal component may be suitable
Cleaning accessible debris or replacing a diaphragm or seal may be reasonable only if the manufacturer supports that repair and you can safely isolate and depressurize the valve. Designs and repair steps vary by make and model. Before disassembly, photograph the assembly and note the orientation of each part. Use the model details to match replacement components. Appearance alone may not confirm compatibility. Rain Bird’s valve troubleshooting guide is one example of manufacturer-specific reference material, but follow the instructions for your own valve.
When a damaged valve or pipe needs professional attention
A cracked valve body, damaged pipe, broken connection, inaccessible shutoff, persistent flooding, or uncertain wiring calls for caution. Don’t keep testing a leak that’s spreading. On Northern Arizona properties, check whether water is affecting nearby grading or draining toward another part of the landscape. If the source or extent of damage is unclear, professional irrigation repair in Flagstaff may provide useful local context. A clear diagnosis helps determine how to fix a leaking sprinkler valve without overlooking a damaged connected line.
How to Fix a Leaking Sprinkler Valve Safely
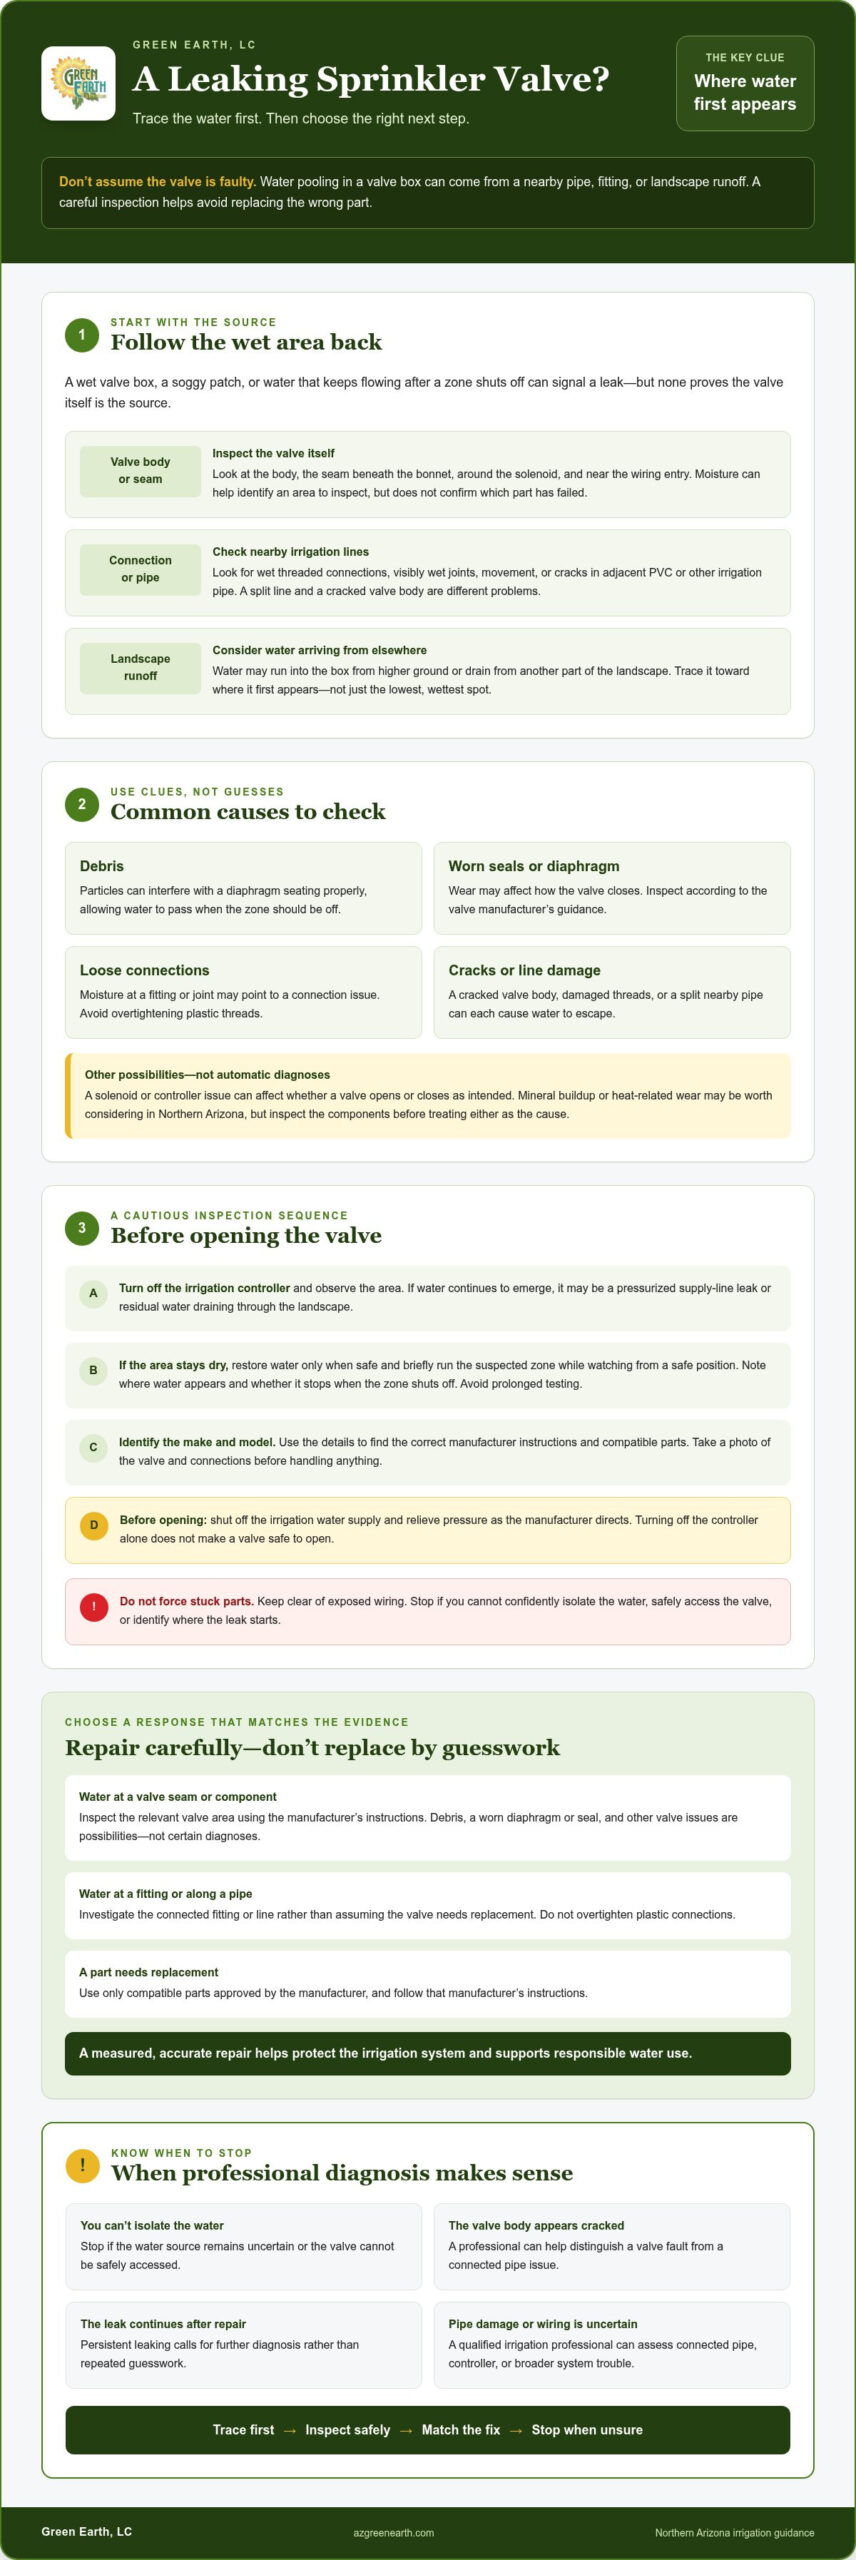
Once you’ve identified a likely cause, limit the repair to what the valve manufacturer permits. The steps below apply only when you can safely shut off the water, access the valve, and identify compatible parts. If the leak comes from a cracked body or connected pipe, or you can’t isolate the water, don’t open the assembly.
A step-by-step inspection and repair sequence
- Shut down the system. Turn off the irrigation controller, then isolate the irrigation water supply. Relieve pressure as directed by the valve manufacturer before opening any part of the assembly.
- Document what you find. Photograph the valve and note the make and model. Before removing an accessible component, take another photo so you can refer to its orientation during reassembly.
- Inspect without forcing parts. Look for debris, wear, misalignment, or visible damage on accessible components. If a part is stuck, don’t pry or twist it forcefully. Stop and consult the manufacturer’s instructions.
- Clean or replace only as appropriate. Remove debris or replace a worn seal or diaphragm only if the inspection points to that component and the manufacturer supports the repair. Use a compatible part matched to the exact valve model, not one selected by appearance alone.
- Reassemble carefully. Follow the model-specific instructions and check that components sit in the correct orientation before restoring water.
Valve designs differ, so don’t substitute a generic repair sequence for the manufacturer’s guidance. If the cause remains uncertain after inspection, professional diagnosis is safer than replacing parts at random.
How to confirm the leak is fixed
Restore the water gradually, following the manufacturer’s directions. Before activating the zone, check the valve and nearby connections for immediate leakage. Then run the affected zone briefly and inspect the valve, fittings, and adjacent pipe while it operates. Check again after the zone shuts off to see whether water continues to pass through.
A repair isn’t complete until the valve has been tested under normal operation and checked for renewed leakage. If water still escapes, shut the system down and seek professional diagnosis rather than repeating a repair you’re unsure about. For issues involving irrigation controls, you can ask about irrigation controller troubleshooting.
When to Call an Irrigation Professional in Northern Arizona
A DIY repair may be reasonable when the leak source is clear, the valve is accessible, the water can be safely shut off, and the manufacturer identifies a compatible replacement part. Stop and seek professional diagnosis if the leak returns after repair, the valve body is cracked, you can’t isolate the water, or the damage remains unclear. Recurring leaks, suspected buried-line damage, uncertain wiring, or problems affecting multiple zones also call for a broader system assessment.
An irrigation professional can check whether the fault is in the valve, a connected pipe, the controller, or another part of the system. That distinction matters: replacing a valve won’t solve a leak caused by a damaged line or a control issue. For homes, commercial landscapes, and HOA properties in Sedona, Camp Verde, Cottonwood, Flagstaff, and Prescott, accurate diagnosis can help limit water loss and support responsible irrigation. Green Earth, LC offers irrigation services as part of its landscaping and construction work.
DIY repair or professional diagnosis: how to decide
Use your confidence and the evidence, not the pressure to finish the repair. If you can’t identify the fault or shut off the water safely, leave the valve closed if possible and avoid further testing. Don’t assume every leak needs a full valve replacement, but don’t keep attempting uncertain repairs either. The appropriate repair and timing depend on the system’s condition and should be determined after inspection.
What information to share when requesting irrigation repair
Clear observations help an irrigation professional begin with useful context. Before requesting help, note:
- When the leak occurs, including whether the affected zone is running or has shut off.
- Where water first appears, such as a valve seam, fitting, nearby pipe, or landscape area.
- The valve’s make and model, if visible, plus photos of the valve and surrounding connections.
- Any recent repair attempts and what you observed at the controller.
Ask whether the assessment will include the valve, nearby pipe connections, and system operation after the repair. Green Earth, LC provides irrigation repair and troubleshooting in Northern Arizona. Confirm current service availability for your location. To discuss the issue, ask Green Earth about irrigation repair.
Protect Your Irrigation System with a Confident Next Step
Knowing how to fix a leaking sprinkler valve begins with locating the leak and matching the repair to its cause. Use manufacturer-approved instructions and compatible parts for a clear, accessible repair, then test the system. If water keeps escaping, the valve is cracked, or you can’t safely isolate the supply, professional diagnosis can help prevent a small fault from becoming broader system trouble.
Green Earth, LC provides irrigation system repair and troubleshooting for residential, commercial, and HOA properties and has over 47 years of landscaping and construction experience. Its Northern Arizona coverage includes Sedona, Camp Verde, Cottonwood, Flagstaff, and Prescott. Confirm availability for your location.
Prompt, accurate repairs help limit water waste and support the health of Northern Arizona landscapes. If you need help assessing a persistent leak, contact Green Earth about irrigation repair. With the right diagnosis, you can move forward with greater confidence and care for your landscape.
Frequently Asked Questions
Why does my sprinkler valve leak when the system is off?
A valve may allow water through after a zone shuts off if debris or a worn diaphragm prevents it from closing fully. Water can also continue draining from another part of the landscape, or the leak may come from a pressurized pipe or fitting near the valve. Note where water first appears and whether it continues after the system is off. That observation helps distinguish a valve issue from nearby drainage.
Can I fix a leaking sprinkler valve myself?
You may be able to handle a clearly identified, accessible problem if you can safely shut off the irrigation supply and the valve manufacturer provides instructions for the repair. Identify the valve model and use compatible parts. Don’t force stuck components or handle exposed wiring. If you’re unsure where water is escaping or how to isolate it, stop. Knowing how to fix a leaking sprinkler valve includes recognizing when DIY work isn’t the safe choice.
How do I tell whether a sprinkler valve or nearby pipe is leaking?
Watch where water first emerges rather than assuming the valve box marks the source. Moisture at the valve body, cover seam, solenoid, or a threaded connection may point to that component. A visibly wet joint or water tracking along a pipe may indicate a line or fitting issue. If the area is soggy but no source is visible, runoff or drainage from elsewhere may be reaching the box.
What causes a sprinkler valve to leak from the top?
Water near the top of a valve can come from a loose or damaged connection, a worn seal, or a problem around the cover or solenoid, depending on the valve design. The location alone doesn’t confirm which part has failed. Turn off the irrigation supply before inspecting, and consult the manufacturer’s instructions for the valve model. Avoid overtightening plastic components, which can damage threads or worsen a leak.
Can debris make a sprinkler valve stay open?
Yes. Debris inside the valve can interfere with the diaphragm’s ability to seat properly, allowing water to pass even when the zone should be off. That’s one possible cause, not a diagnosis based on symptoms alone. If the manufacturer allows cleaning, isolate the water and follow its model-specific instructions. If the valve continues passing water afterward, stop and investigate other possible valve, controller, or system problems.
Should I replace a leaking sprinkler valve or repair it?
Choose repair or replacement based on the identified damage, not just the presence of water. Accessible debris or a serviceable worn diaphragm may be addressed with a manufacturer-approved repair. A cracked valve body or damaged connected pipe may need component replacement or broader irrigation repair. Match parts to the exact valve model, since similar-looking components aren’t necessarily compatible. If the source is uncertain, professional diagnosis can help avoid unnecessary replacement.
When should I call an irrigation professional for a leaking valve?
Call for professional help if a leak persists after repair, the valve body is cracked, you can’t isolate the water, or damage or wiring is unclear. Buried-line concerns or multiple affected zones also warrant a broader inspection. Green Earth, LC provides irrigation system repair and troubleshooting for residential, commercial, and HOA properties. Its Northern Arizona coverage includes Sedona, Camp Verde, Cottonwood, Flagstaff, and Prescott. Confirm availability for your location.
Recent Comments